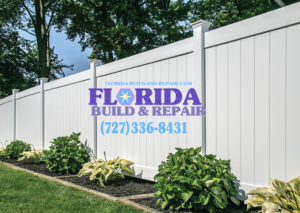
Step-by-Step Guide to Vinyl Privacy Fence Installation in Cape Coral
Here’s a step-by-step guide to installing a vinyl privacy fence in Cape Coral. This assumes you’re working with a standard vinyl fence kit and have a relatively flat yard. Adjust as needed for your specific situation.
Tools and Materials Needed:
- Vinyl fence panels, posts, and caps (pre-purchased kit or custom order)
- Post hole digger or auger
- Shovel
- Level
- Measuring tape
- String and stakes
- Concrete mix
- Gravel
- Rubber mallet
- Screwdriver or drill (for some kits with brackets)
- Safety gear (gloves, goggles)
Step 1: Plan and Mark the Layout
- Check Local Regulations: Confirm zoning laws, permits, or HOA rules. Locate utility lines by calling 811 (in the US).
- Measure the Area: Determine the length of the fence line and calculate how many panels and posts you’ll need. Vinyl panels typically come in 6- or 8-foot sections.
- Mark the Fence Line: Use stakes and string to outline the fence path. Ensure it’s straight (unless intentionally curved). Mark post locations at intervals matching your panel length (e.g., 6 or 8 feet apart, center-to-center).
Step 2: Prepare the Ground
- Clear the Area: Remove rocks, plants, or debris along the fence line.
- Level the Terrain: Minor unevenness is fine (vinyl can flex slightly), but grade severe slopes or fill low spots for stability.
Step 3: Dig Post Holes
- Determine Hole Depth: Posts should be buried about 1/3 of their length (e.g., 2-3 feet deep for a 6-foot fence) for stability.
- Dig Holes: Use a post hole digger or auger. Holes should be 8-12 inches wide to allow for concrete. Space them according to your panel size.
- Add Gravel: Pour 4-6 inches of gravel into each hole for drainage.
Step 4: Set the Posts
- Insert the First Post: Place a vinyl post in the first hole. Most kits use hollow posts that slide over rebar or sit directly in concrete.
- Check Vertical Alignment: Use a level to ensure the post is plumb (straight up and down) on all sides.
- Pour Concrete: Mix concrete per the bag’s instructions and fill the hole around the post, leaving a slight slope away from the post for water runoff.
- Secure Temporarily: Brace the post with stakes or supports while the concrete sets (24-48 hours).
- Repeat: Install the corner or end posts next, then fill in intermediate posts, ensuring consistent spacing.
Step 5: Attach Rails and Panels
- Check Post Height: Once concrete is set, ensure posts are at the correct height (some kits allow trimming; others have pre-set notches).
- Install Bottom Rails: Slide or snap the bottom rail into the first post (depends on your kit—some use brackets or screws).
- Add Panels: Insert the vinyl panel into the bottom rail and secure it to the post (via notches, brackets, or screws).
- Install Top Rails: Attach the top rail over the panel, locking it into the posts. Repeat for each section.
- Adjust Alignment: Use a level to ensure panels are even and posts remain plumb as you go.
Step 6: Finishing Touches
- Add Post Caps: Snap or glue decorative caps onto each post.
- Inspect the Fence: Check for loose connections or gaps. Tighten screws or tap components with a rubber mallet if needed.
- Clean Up: Wash the vinyl with soap and water to remove dirt from installation.
Tips:
- Work in small sections to avoid misalignment.
- If the ground slopes, step the fence (install panels at different heights) or use longer posts and trim panels to fit.
- Vinyl expands in heat and contracts in cold, so leave slight gaps if recommended by the manufacturer.
That’s it! You should have a sturdy, low-maintenance vinyl privacy fence in Cape Coral. Let me know if you need help with a specific part of the process.

Cape Coral Vinyl Privacy Fence Installation: Cost, Tips, and Benefits
Installing a vinyl privacy fence in Cape Coral is a smart way to boost seclusion, security, and style with minimal upkeep. Here’s a breakdown of

How to Install a Cape Coral Vinyl Privacy Fence Like a Pro
Installing a Cape Coral vinyl privacy fence like a pro means focusing on precision, efficiency, and a polished finish—without overcomplicating it. Here’s how to nail

Top Mistakes to Avoid When Installing a Vinyl Privacy Fence in Cape Coral
Installing a vinyl privacy fence in Cape Coral can go smoothly if you sidestep common pitfalls. Here are the top mistakes to avoid, based on

DIY Vinyl Privacy Fence Installation in Cape Coral: What You Need to Know
Installing a DIY vinyl privacy fence in Cape Coral can be a rewarding project that boosts privacy and curb appeal with minimal upkeep. Here’s what

Step-by-Step Guide to Vinyl Privacy Fence Installation in Cape Coral
Here’s a step-by-step guide to installing a vinyl privacy fence in Cape Coral. This assumes you’re working with a standard vinyl fence kit and have


