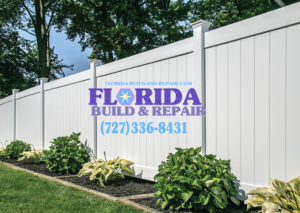
Step-by-Step Guide to St. Petersburg Privacy Fence Installation
- Privacy Fence Costs St. Petersburg, Privacy Fence Installation St. Petersburg, Vinyl Privacy Fence Contractor St. Petersburg, Wood Privacy Fence Service St. Petersburg
Here’s a step-by-step guide to installing a privacy fence in St. Petersburg:
Step 1: Plan and Mark the Site
- Identify Utilities: Call your local utility locator hotline to identify buried services like water and electricity.
- Mark Fence Perimeter: Use stakes and twine to mark the fence location. Ensure the twine is taut and level.
- Record Measurements: Measure and record the length of the fence area to determine the number of posts and materials needed.
Step 2: Gather Materials and Tools
- Materials Needed:
- Four-by-four fence posts
- Fence rails (top, bottom, and middle if needed)
- Fence slats or panels
- Concrete mix
- Gravel
- Galvanized screws or nails
- Wood stain or paint (optional)
- Tools Needed:
- Post-hole digger
- Shovel
- Level (bubble or laser)
- Tape measure
- Hammer
- Drill or screwdriver
- Safety gear (gloves, hard hat)
Step 3: Dig Post Holes
- Depth: Dig holes to a depth of one-third to one-half the height of the fence.
- Width: Make the holes wider at the bottom than at the top to prevent posts from tipping.
- Spacing: Typically, posts are spaced 6-8 feet apart.
Step 4: Prepare Post Holes
- Add Gravel Base: Pour about 4-6 inches of gravel into each hole for drainage and stability.
- Tamp Gravel: Use a four-by-four to tamp the gravel firmly.
Step 5: Set Posts in Concrete
- Position Posts: Place posts in the center of each hole, ensuring they are plumb and level.
- Brace Posts: Use temporary braces to hold posts in place.
- Mix and Pour Concrete: Follow the manufacturer’s instructions to mix concrete, then pour it into the holes around the posts.
- Taper Concrete: Taper the concrete away from the post to direct water runoff.
- Allow to Cure: Let the concrete cure for at least 24 hours.
Step 6: Check Alignment and Height
- Use String Line: Check that all posts are aligned using a string line.
- Trim Posts: Trim posts to ensure uniform height if necessary.
Step 7: Attach Fence Rails
- Top and Bottom Rails: Attach these rails to the posts using galvanized screws or nails. Ensure they are level.
- Middle Rail: If using, position it halfway between the top and bottom rails for added support.
Step 8: Install Fence Slats or Panels
- Position Slats: Start at one end and work your way along the fence, ensuring each slat is plumb.
- Space Slats: Use spacers for consistent gaps between slats, depending on desired privacy.
- Secure Slats: Attach slats to rails using galvanized screws or nails.
Step 9: Final Inspection and Touch-ups
- Check Stability: Ensure all posts and rails are secure.
- Stain or Paint: Apply stain or paint to protect the wood and enhance appearance.
Handling Sloped Terrain
- Stepped Fence: For significant slopes, create level sections that step up or down.
- Racked Fence: For gentle slopes, follow the ground contour with angled rails.
By following these steps, you can successfully install a sturdy and visually appealing St. Petersburg privacy fence.

Clearwater Privacy Fence Costs by Material: Wood, Vinyl, and More
The cost of a privacy fence in Clearwater, Florida, varies significantly by material, with wood and vinyl being the most common options. Below is a

St. Petersburg Custom Wood Privacy Fence Service: Designed for You
Custom Wood Privacy Fence Service: Designed for You A custom wood privacy fence in St. Petersburg is more than just a boundary; it’s a statement

The Benefits of Working with a Licensed St. Petersburg Privacy Fence Contractor
Working with a licensed privacy fence contractor in St. Petersburg offers numerous benefits that enhance the quality, safety, and value of your fencing project. Here

Affordable St. Petersburg Privacy Fence Options: Cutting Costs Without Cutting Quality
Affordable Privacy Fence Options in St. Petersburg: Cutting Costs Without Cutting Quality When looking for budget-friendly privacy fence options in 2025, several materials and designs

How Much Does a St. Petersburg Privacy Fence Cost
The cost of installing a privacy fence in 2025 varies widely depending on several factors, but generally ranges from $1,800 to $12,000, with a national

Step-by-Step Guide to St. Petersburg Privacy Fence Installation
Here’s a step-by-step guide to installing a privacy fence in St. Petersburg: Step 1: Plan and Mark the Site Step 2: Gather Materials and Tools

How Much Does a Vinyl Privacy Fence Cost in St. Petersburg
The cost of a vinyl privacy fence in St. Petersburg varies depending on several factors, but generally ranges from $25 to $85 per linear foot


