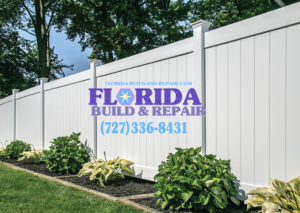
How to Install a Florida Vinyl Privacy Fence Like a Pro
- Vinyl Privacy Fence Installation Belle Glade, Vinyl Privacy Fence Installation Boca Raton, Vinyl Privacy Fence Installation Boynton Beach, Vinyl Privacy Fence Installation Coconut Creek, Vinyl Privacy Fence Installation Coral Springs, Vinyl Privacy Fence Installation Deerfield Beach, Vinyl Privacy Fence Installation Delray Beach, Vinyl Privacy Fence Installation Florida, Vinyl Privacy Fence Installation Jupiter, Vinyl Privacy Fence Installation Royal Palm Beach, Vinyl Privacy Fence Installation Tamarac, Vinyl Privacy Fence Installation Wellington, Vinyl Privacy Fence Installation West Palm Beach
Here’s a professional guide to installing a Florida vinyl privacy fence, ensuring durability and compliance with local conditions:
Step-by-Step Installation Guide
1. Planning and Preparation
- Check Local Regulations: Obtain permits and ensure compliance with Florida-specific zoning laws, especially wind load requirements.
- Mark Property Lines: Use stakes and string or spray paint to outline the fence line.
- Call 811: Contact utility companies to mark underground lines before digging.
2. Gather Tools and Materials
- Tools: Post hole digger, level, tape measure, power drill, circular saw with a fine-tooth carbide blade, vinyl notching tool, and gravel.
- Materials: Vinyl panels, posts, rails, concrete mix, and post caps.
3. Dig Post Holes
- Use a post hole digger or power auger to dig holes at least one-third the height of the post. Florida’s sandy soil may require deeper holes for stability.
- Add 6 inches of gravel at the bottom for drainage.
4. Set Posts
- Place posts in holes and use a level to ensure they are plumb.
- Pour concrete over the gravel base, leaving 6 inches below ground level for soil cover.
- Allow concrete to cure before proceeding.
5. Install Fence Panels
- Attach bottom rails to posts first. Use screws or snap-lock systems as specified by the manufacturer.
- Insert pickets into the bottom rail and secure them with the top rail.
- Use a level to ensure panels are straight before securing.
6. Adjust for Slopes
- Use a vinyl notching tool or nibblers to elongate rail holes for racking panels on sloped terrain.
7. Attach Gates
- Secure gate posts with additional concrete for stability.
- Install hinges and latches according to manufacturer instructions.
8. Add Finishing Touches
- Snap or screw post caps onto posts for a polished look.
- Clean up debris and inspect the fence for any adjustments.
Florida-Specific Considerations
- Wind Resistance: Ensure your fence meets local wind load standards (e.g., withstands 100+ mph winds).
- UV Protection: Choose vinyl with UV inhibitors to prevent fading or cracking under intense sunlight.
- Drainage: Proper gravel bases under posts help prevent water pooling in Florida’s rainy climate.
By following these steps and using high-quality tools and materials, you can achieve a professional-looking vinyl privacy fence that withstands Florida’s unique environmental challenges.

West Palm Beach Fence Installation on a Budget: Affordable Options That Look Great
If you’re looking for affordable fence installation options in West Palm Beach that still look great, consider the following: Affordable Fence Materials Budget-Friendly Installation Tips

How to Install a Florida Vinyl Privacy Fence Like a Pro
Here’s a professional guide to installing a Florida vinyl privacy fence, ensuring durability and compliance with local conditions: Step-by-Step Installation Guide 1. Planning and Preparation


