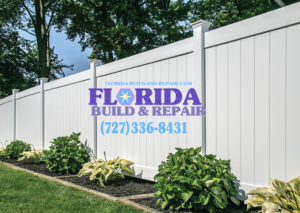
The Ultimate Sanford Vinyl Privacy Fence Installation Checklist
- Vinyl Privacy Fence Installation Altamonte Springs, Vinyl Privacy Fence Installation Casselberry, Vinyl Privacy Fence Installation Florida, Vinyl Privacy Fence Installation Lake Mary, Vinyl Privacy Fence Installation Longwood, Vinyl Privacy Fence Installation Maitland, Vinyl Privacy Fence Installation Oviedo, Vinyl Privacy Fence Installation Sanford, Vinyl Privacy Fence Installation Union Park, Vinyl Privacy Fence Installation University, Vinyl Privacy Fence Installation Winter Springs
Here’s the ultimate checklist for installing a vinyl privacy fence in Sanford, Florida:
Planning and Preparation
- Define your fence purpose (privacy, security, etc.)
- Research Sanford zoning laws and HOA requirements
- Mark property lines accurately
- Determine budget and purchase materials
- Call 811 to locate underground utilities
- Obtain necessary permits
Tools and Materials
- Vinyl fence panels, posts, rails, and pickets
- Concrete mix
- Post hole digger or auger
- Level and measuring tape
- Power drill and screws
- String line and stakes
- Shovel and wheelbarrow
Installation Steps
- Measure and mark fence line using stakes and string
- Dig post holes (at least 3 feet deep for Florida’s conditions)
- Add 6 inches of gravel at the bottom of each hole for drainage
- Set end and corner posts first using dry concrete mix
- Install remaining posts, ensuring they’re level and plumb
- Allow concrete to cure (follow manufacturer’s instructions)
- Install bottom rails between posts
- Assemble and attach fence panels
- Secure top rails
- Install post caps for a finished look
Florida-Specific Considerations
- Choose UV-resistant vinyl to prevent fading and cracking
- Ensure fence meets local wind load requirements (100+ mph)
- Allow for expansion and contraction due to temperature changes
- Consider additional reinforcement for hurricane resistance
Final Steps
- Install any gates, following manufacturer’s instructions
- Clean up the work area
- Inspect the entire fence for proper installation
- Schedule final inspection if required by local authorities
By following this checklist, Sanford homeowners can ensure a successful vinyl privacy fence installation that complies with local regulations and withstands Florida’s unique climate challenges.

The Cost of Privacy Fence Installation in Florida: What to Expect
Privacy fence installation in Florida represents a significant investment for homeowners, with costs varying widely based on materials, dimensions, location, and local regulations. This comprehensive

Metal Fence Installation in Sanford: Pros, Cons, and Best Uses
Metal fence installation in Sanford offers several advantages and potential drawbacks. Here’s an overview of the pros, cons, and best uses for metal fencing in

Florida Fence Installation 101: Choosing the Right Fence for Your Property
Choosing the Right Fence for Your Florida Property Purpose and FunctionalityThe first step in selecting the right fence is determining its primary purpose. Common reasons

The Ultimate Sanford Vinyl Privacy Fence Installation Checklist
Here’s the ultimate checklist for installing a vinyl privacy fence in Sanford, Florida: Planning and Preparation Tools and Materials Installation Steps Florida-Specific Considerations Final Steps


