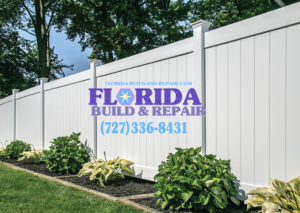
How to Install a Cape Coral Vinyl Privacy Fence Like a Pro
Installing a Cape Coral vinyl privacy fence like a pro means focusing on precision, efficiency, and a polished finish—without overcomplicating it. Here’s how to nail it, step by step, with tricks pros use to make it look seamless and last decades.
Prep Like a Pro
- Know the Rules: Call 811 (in the US) to mark utilities. Check local codes and HOA regs for height, setback, or permit requirements.
- Measure Twice: Map your fence line with a tape measure. Divide by panel length (e.g., 6 or 8 feet) to determine post spacing. Pros mark exact post centers with stakes and a taut string line—wiggly string equals crooked fences.
- Gather Gear: Vinyl kit (panels, posts, rails, caps), post hole digger (or auger for speed), level, concrete mix, gravel, rubber mallet, drill (for brackets), and safety stuff (gloves, goggles).
Step 1: Set Posts with Precision
- Dig Smart: Holes should be 2-3 feet deep (1/3 of post height) and 8-12 inches wide. Pros use an auger for consistency—rent one if roots or rocks slow you down.
- Base It Right: Drop 4-6 inches of gravel in each hole for drainage—skipping this is amateur hour.
- Place End Posts First: Set corner or end posts to anchor your line. Slide posts in, level them (side-to-side and front-to-back), and pour concrete. Slope the top away from the post for runoff. Brace with stakes or scrap wood—pros don’t eyeball it.
- String It Up: Run a string between cured end posts at the height of your bottom rail. This guides intermediate posts. Check it with a line level.
- Fill In: Dig and set remaining posts along the string, keeping spacing exact. Pros double-check plumb with a 4-foot level every time. Let concrete cure 24-48 hours—rushing ruins it.
Step 2: Install Rails and Panels Like Clockwork
- Trim Posts (If Needed): Pros cut posts to height after setting, using a circular saw with a fine-tooth blade. Check your kit—some snap rails in at preset notches.
- Bottom Rails First: Slide or snap bottom rails into posts. Pros keep a level handy to ensure rails sit even—slight dips show in the final look.
- Drop in Panels: Fit panels into the bottom rail, then secure to posts (notches, brackets, or screws—depends on your kit). Tap gently with a rubber mallet if snug. Pros work section-by-section, checking alignment as they go.
- Top Rails Lock It In: Cap panels with top rails, clicking them into posts. If it’s a fight, you’ve got a post off plumb—fix it now.
Step 3: Handle Slopes Like a Boss
- Stepping: For steep slopes, drop each panel section lower, keeping posts vertical. Pros measure the drop with a level and string to keep it uniform.
- Racking: On gentle slopes, angle panels to follow the ground (if your kit allows). Pros test one section first—some vinyl won’t flex without cracking.
Step 4: Finish with Finesse
- Cap Posts: Snap or glue on post caps. Pros wipe them clean—smudges stand out on vinyl.
- Inspect: Walk the line. Tighten screws, nudge panels flush, and check for gaps. Pros fix wobbles now, not later.
- Clean Up: Hose off dirt or concrete splatter. A pro’s fence shines out of the gate.
Pro Tricks
- Pre-Drill Brackets: If your kit uses screws, pre-drill to avoid stripping vinyl.
- Use a Spacer: Cut a scrap piece to your panel gap (e.g., 1/8 inch) and slide it between connections—keeps expansion gaps consistent.
- Work in Pairs: One holds, one levels—cuts time and boosts accuracy.
- Square Corners: Use a 3-4-5 triangle (3 feet one way, 4 the other, 5 diagonal) to ensure 90-degree turns.
What Sets Pros Apart
- No Shortcuts: They don’t skip gravel, rush concrete, or fudge measurements.
- Tools Matter: Augers, long levels, and string lines beat eyeballing it.
- Attention to Detail: Every post plumb, every panel flush—sloppy work screams DIY.
Follow this, and your Cape Coral vinyl privacy fence will look like a hired job—solid, straight, and slick. If you hit a curveball (weird slope, gate add-on), let me know—I’ll tweak the plan for you. Ready to roll?

Cape Coral Vinyl Privacy Fence Installation: Cost, Tips, and Benefits
Installing a vinyl privacy fence in Cape Coral is a smart way to boost seclusion, security, and style with minimal upkeep. Here’s a breakdown of

How to Install a Cape Coral Vinyl Privacy Fence Like a Pro
Installing a Cape Coral vinyl privacy fence like a pro means focusing on precision, efficiency, and a polished finish—without overcomplicating it. Here’s how to nail

Top Mistakes to Avoid When Installing a Vinyl Privacy Fence in Cape Coral
Installing a vinyl privacy fence in Cape Coral can go smoothly if you sidestep common pitfalls. Here are the top mistakes to avoid, based on

DIY Vinyl Privacy Fence Installation in Cape Coral: What You Need to Know
Installing a DIY vinyl privacy fence in Cape Coral can be a rewarding project that boosts privacy and curb appeal with minimal upkeep. Here’s what

Step-by-Step Guide to Vinyl Privacy Fence Installation in Cape Coral
Here’s a step-by-step guide to installing a vinyl privacy fence in Cape Coral. This assumes you’re working with a standard vinyl fence kit and have


