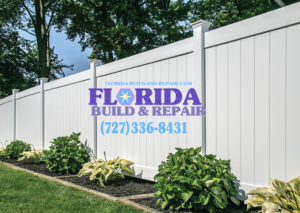
Step-by-Step Guide to Florida Vinyl Privacy Fence Installation
- Vinyl Privacy Fence Installation Bayshore Gardens, Vinyl Privacy Fence Installation Bradenton, Vinyl Privacy Fence Installation Englewood, Vinyl Privacy Fence Installation Florida, Vinyl Privacy Fence Installation Fruitville, Vinyl Privacy Fence Installation Gulf Gate Estates, Vinyl Privacy Fence Installation Lakewood Ranch, Vinyl Privacy Fence Installation North Port, Vinyl Privacy Fence Installation Palmetto, Vinyl Privacy Fence Installation Sarasota, Vinyl Privacy Fence Installation Sarasota Springs, Vinyl Privacy Fence Installation South Bradenton, Vinyl Privacy Fence Installation South Venice, Vinyl Privacy Fence Installation Venice
Here’s a step-by-step guide to installing a vinyl privacy fence in Florida, optimized for the state’s unique climate and building requirements:
1. Planning and Preparation
- Check Local Regulations: Verify Florida building codes, HOA rules, and zoning laws (height, setback, wind load requirements).
- Mark Property Lines: Use landscape stakes and string to outline the fence path.
- Call 811: Contact Sunshine 811 to locate underground utilities before digging.
- Gather Materials: Purchase UV-resistant vinyl panels, posts, rails, concrete mix (e.g., Sakrete), and gravel.
2. Digging Post Holes
- Hole Dimensions: Dig holes 10–12 inches wide and 3 feet deep (1/3 the post height) to accommodate Florida’s sandy soil.
- Drainage: Add 6 inches of gravel at the base of each hole to prevent water pooling.
3. Setting Posts
- Align Posts: Use a string line to ensure posts are straight and spaced correctly (6–8 feet apart).
- Concrete Installation:
- Insert posts into holes and secure with quick-set concrete.
- Check for plumb with a level, adjusting before the concrete sets.
- Leave 6 inches below ground for soil cover.
4. Installing Panels and Rails
- Bottom Rails: Attach rails to posts first, ensuring they’re level.
- Assemble Panels:
- Insert vinyl pickets into U-channels or tongue-and-groove systems.
- Secure top rails for stability.
- Sloped Terrain: Use a vinyl notching tool to adjust rail holes for uneven ground.
5. Adding Gates
- Gate Posts: Install with extra concrete for reinforcement.
- Hardware: Follow manufacturer instructions for hinges, latches, and locks.
6. Finishing Touches
- Post Caps: Install for aesthetics and to protect posts.
- Cleanup: Remove debris and inspect for alignment issues.
Florida-Specific Tips
- UV Resistance: Choose vinyl with UV inhibitors to prevent fading.
- Wind Load Compliance: Ensure posts and panels meet Florida’s hurricane standards (100+ mph wind resistance).
- Avoid Gravel in Some Areas: South/Central Florida codes may not require gravel in post holes.
By following these steps, you’ll achieve a durable, code-compliant vinyl privacy fence that withstands Florida’s heat, humidity, and storms. For complex projects, consult local contractors or engineers to verify wind-load requirements.

The Cost of Privacy Fence Installation in Florida: What to Expect
Privacy fence installation in Florida represents a significant investment for homeowners, with costs varying widely based on materials, dimensions, location, and local regulations. This comprehensive

Best Fence Installation Options for North Port Pet Owners
When it comes to fence installation for pet owners in North Port, several options stand out based on durability, safety, and aesthetics. Here are the

Florida Fence Installation 101: Choosing the Right Fence for Your Property
Choosing the Right Fence for Your Florida Property Purpose and FunctionalityThe first step in selecting the right fence is determining its primary purpose. Common reasons

Step-by-Step Guide to Florida Vinyl Privacy Fence Installation
Here’s a step-by-step guide to installing a vinyl privacy fence in Florida, optimized for the state’s unique climate and building requirements: 1. Planning and Preparation


