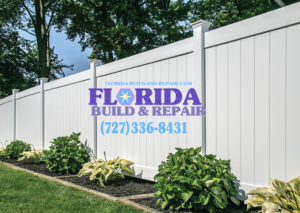
Step-by-Step Guide to Ocala Vinyl Privacy Fence Installation
- Vinyl Privacy Fence Installation Belleview, Vinyl Privacy Fence Installation Dunnellon, Vinyl Privacy Fence Installation Florida, Vinyl Privacy Fence Installation Ocala, Vinyl Privacy Fence Installation Silver Springs Shores, Vinyl Privacy Fence Installation The Villages, Vinyl Privacy Fence Installation Wildwood
Here’s a step-by-step guide to installing a vinyl privacy fence in Ocala, Florida:
Planning and Preparation
- Check Local Regulations: Verify Ocala zoning laws and obtain necessary permits. Ensure compliance with Florida Building Code requirements, especially for wind loads.
- Mark Property Lines: Use stakes and string to outline the fence path. Call 811 to mark underground utilities before digging.
- Gather Materials: Purchase UV-resistant vinyl panels, posts, rails, concrete mix, and gravel.
Tools and Materials Needed
- Post hole digger or power auger
- Level and measuring tape
- Power drill and screws
- Vinyl notching tool (for slopes)
- Gravel for drainage
- Safety gear (gloves, goggles)
Installation Steps
1. Measure and Mark Fence Line
- Use stakes and string to mark the fence path, ensuring alignment with property lines.
- Measure from corner to corner to ensure straightness.
2. Dig Post Holes
- Hole Dimensions: Dig holes 10 inches in diameter and 3 feet deep for stability in Ocala’s soil.
- Drainage: Add 6 inches of gravel at the bottom for drainage.
3. Set Posts
- Alignment: Use a string line to ensure posts are straight and spaced correctly (6–8 feet apart).
- Concrete Installation:
- Insert posts into holes and secure with quick-set concrete.
- Check for plumb with a level, adjusting before the concrete sets.
- Leave 6 inches below ground for soil cover.
4. Install Fence Panels
- Bottom Rails: Attach rails to posts first.
- Pickets and U-Channels: Insert pickets into U-channels or tongue-and-groove systems.
- Top Rails: Secure top rails for stability.
5. Adjust for Slopes
- Step Method: Measure horizontally and adjust rail heights accordingly.
- Vinyl Notching Tool: Use to elongate rail holes if needed.
6. Add Gates and Finishing Touches
- Gate Posts: Install with extra concrete for stability.
- Hardware: Follow manufacturer instructions for gate hardware.
- Post Caps: Add for a polished look.
Ocala-Specific Tips
- Choose UV-Resistant Vinyl: Protects against fading and cracking under intense sunlight.
- Ensure Wind Load Compliance: Use reinforced posts and panels to meet Florida’s hurricane standards.
- Consider Local Contractors: Companies like Fence Pro Mid FL offer professional installation services tailored to Ocala’s climate and regulations.
By following these steps and tips, you can ensure a successful vinyl privacy fence installation in Ocala that is both durable and compliant with local regulations.

Best Tools and Materials for a Smooth Vinyl Privacy Fence Installation in The Villages
For a smooth vinyl privacy fence installation in The Villages, you’ll need the following essential tools and materials: Tools Materials Key Considerations By using these

Florida Fence Installation 101: Choosing the Right Fence for Your Property
Choosing the Right Fence for Your Florida Property Purpose and FunctionalityThe first step in selecting the right fence is determining its primary purpose. Common reasons

Step-by-Step Guide to Ocala Vinyl Privacy Fence Installation
Here’s a step-by-step guide to installing a vinyl privacy fence in Ocala, Florida: Planning and Preparation Tools and Materials Needed Installation Steps 1. Measure and


