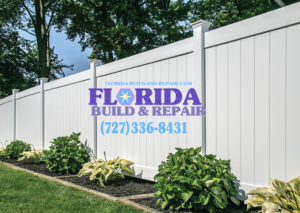
Top Mistakes to Avoid When Installing a Vinyl Privacy Fence in Cape Coral
Installing a vinyl privacy fence in Cape Coral can go smoothly if you sidestep common pitfalls. Here are the top mistakes to avoid, based on typical DIY challenges and practical know-how, to ensure your fence stands strong and looks sharp.
1. Skipping Local Regulations and Utility Checks
- Why It’s a Problem: Ignoring permits, HOA rules, or property lines can lead to fines or tearing down your work. Digging into utility lines risks safety and costly repairs.
- Fix It: Check with your local municipality for permits and HOA guidelines. Call 811 (in the US) to mark gas, water, or electric lines before digging.
2. Poor Planning and Measurement
- Why It’s a Problem: Misjudging panel spacing or fence length leaves you with awkward gaps or extra posts you can’t use. Vinyl kits aren’t always easy to trim.
- Fix It: Measure your fence line twice. Mark post locations with stakes and string, matching your panel size (e.g., 6 or 8 feet apart, center-to-center). Account for gates or corners.
3. Misaligned or Unleveled Posts
- Why It’s a Problem: Crooked posts throw off the entire fence, making panels wobbly or uneven. Vinyl doesn’t flex much to hide mistakes.
- Fix It: Use a level on every post (vertically and horizontally). Set end posts first, then run a string line to keep intermediates straight. Brace posts while concrete cures.
4. Rushing Concrete Setting
- Why It’s a Problem: Attaching panels before concrete fully hardens (24-48 hours) can shift posts, weakening the structure.
- Fix It: Patience is key. Pour concrete, brace posts, and wait. Mix concrete to the right consistency—too watery weakens it.
5. Ignoring Drainage and Gravel
- Why It’s a Problem: No gravel base traps water around posts, leading to rot (even vinyl posts can shift if the ground erodes).
- Fix It: Add 4-6 inches of gravel to each post hole before pouring concrete. Slope the concrete away from the post for runoff.
6. Overlooking Expansion and Contraction
- Why It’s a Problem: Vinyl expands in heat and shrinks in cold. Tight fits crack panels or pop rails loose over time.
- Fix It: Follow manufacturer gaps (usually 1/16 to 1/8 inch at connections). Avoid installing in extreme weather if possible.
7. Using the Wrong Tools or Force
- Why It’s a Problem: Hammering vinyl with a metal hammer cracks it. Overtightening screws strips brackets.
- Fix It: Use a rubber mallet for tapping and a drill or screwdriver for brackets. Go gentle—vinyl isn’t wood.
8. Neglecting Slope Adjustments
- Why It’s a Problem: Flat-panel installs on sloped yards look jagged or leave gaps underneath.
- Fix It: “Step” the fence (drop panels at intervals) or rack it (angle panels to follow the slope). Check your kit—some vinyl styles don’t rack well.
9. Forgetting Post Caps or Final Checks
- Why It’s a Problem: Uncapped posts collect water and debris, and loose panels rattle in wind.
- Fix It: Snap or glue on caps (included in most kits). Walk the fence line after install to tighten screws or nudge components into place.
10. Underestimating Time or Help
- Why It’s a Problem: Solo installs drag on, and fatigue leads to sloppy work—like uneven posts or skipped steps.
- Fix It: Budget 1-2 days for 50-100 feet. Recruit a friend for lifting panels and holding posts steady.
Bonus Tip: Don’t Skimp on Quality
Cheap vinyl fades, cracks, or warps faster. Spend a bit more for UV-resistant, thicker-gauge material—it pays off in years of no hassle.
Avoid these traps, and you’ll have a solid, good-looking Cape Coral vinyl privacy fence without the headaches. If you’re worried about a specific step, just ask—I’ve got your back!

Cape Coral Vinyl Privacy Fence Installation: Cost, Tips, and Benefits
Installing a vinyl privacy fence in Cape Coral is a smart way to boost seclusion, security, and style with minimal upkeep. Here’s a breakdown of

How to Install a Cape Coral Vinyl Privacy Fence Like a Pro
Installing a Cape Coral vinyl privacy fence like a pro means focusing on precision, efficiency, and a polished finish—without overcomplicating it. Here’s how to nail

Top Mistakes to Avoid When Installing a Vinyl Privacy Fence in Cape Coral
Installing a vinyl privacy fence in Cape Coral can go smoothly if you sidestep common pitfalls. Here are the top mistakes to avoid, based on

DIY Vinyl Privacy Fence Installation in Cape Coral: What You Need to Know
Installing a DIY vinyl privacy fence in Cape Coral can be a rewarding project that boosts privacy and curb appeal with minimal upkeep. Here’s what

Step-by-Step Guide to Vinyl Privacy Fence Installation in Cape Coral
Here’s a step-by-step guide to installing a vinyl privacy fence in Cape Coral. This assumes you’re working with a standard vinyl fence kit and have


